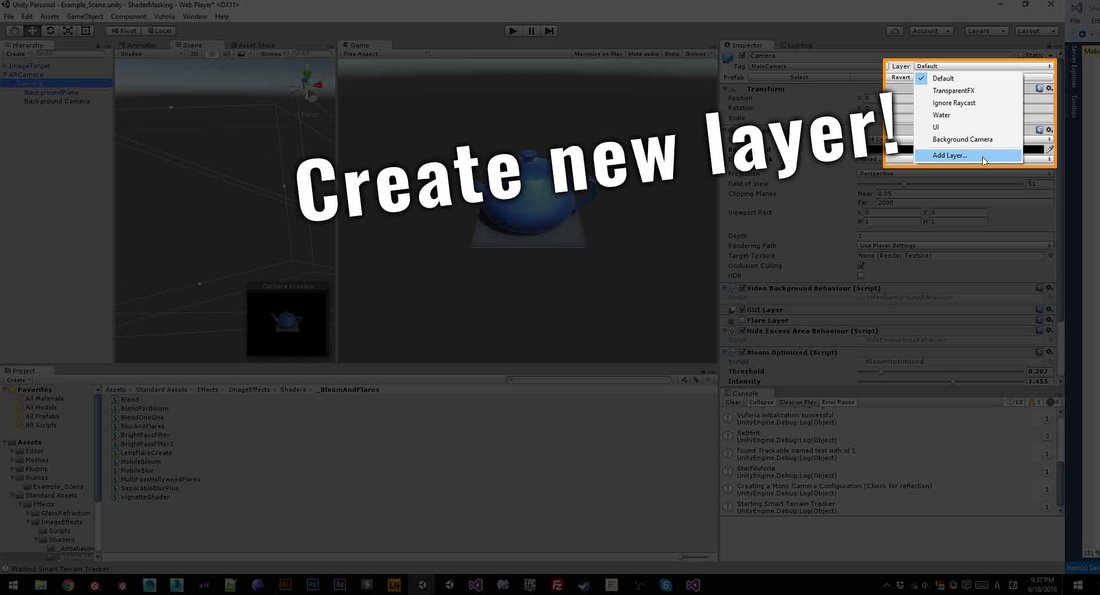
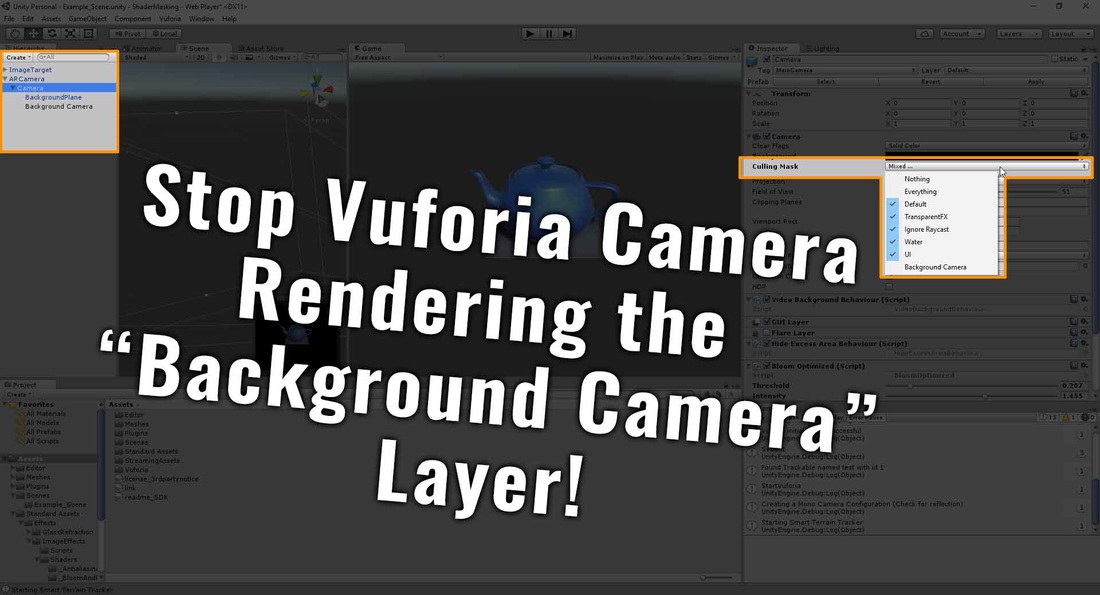
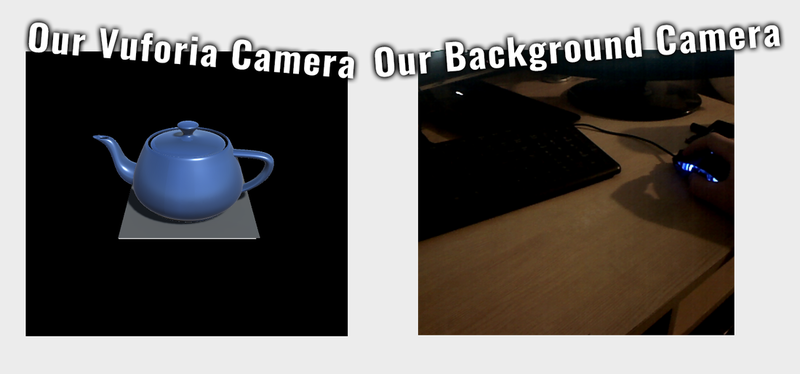
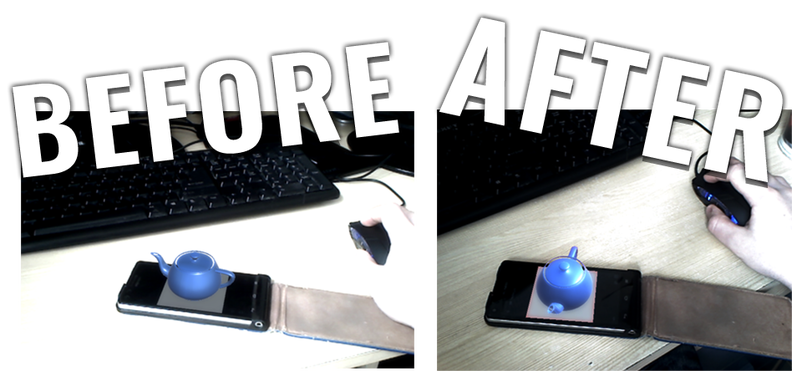
Unity & Vuforia - How to mask Image Effects e.g. Bloom.

6/19/2016

3 Comments


Intro

Recently, while working with Vuforia I came across a hurdle in a project that I hadn't anticipated, hopefully this little post will save you days worth of work, hair pulling and your remaining sanity.

Tasked with boosting a scene's vibrance and visual appeal, the Bloom (optimized mobile version) script is a handy quick way of getting the desired effect with the ability to alter later on.
My setup had a camera feed from a mobile device acting as the background where a GameObject is overlaid on top .... The catch! The Bloom was "Blooming" my camera feed as well! I needed to somehow mask my bloom from the background.​

-- Note that the reason this hurdle occurred was because I'm using Vuforia, currently (6/19/2016) there isn't a way to separate the background using settings in Vuforia which is why I have created this tutorial. --
​

The Concept 

Ultimately the concept goes as follows, create secondary camera to only render the background and the primary camera renders everything but the background. Then using some code wizardly, we'll comp the two together.
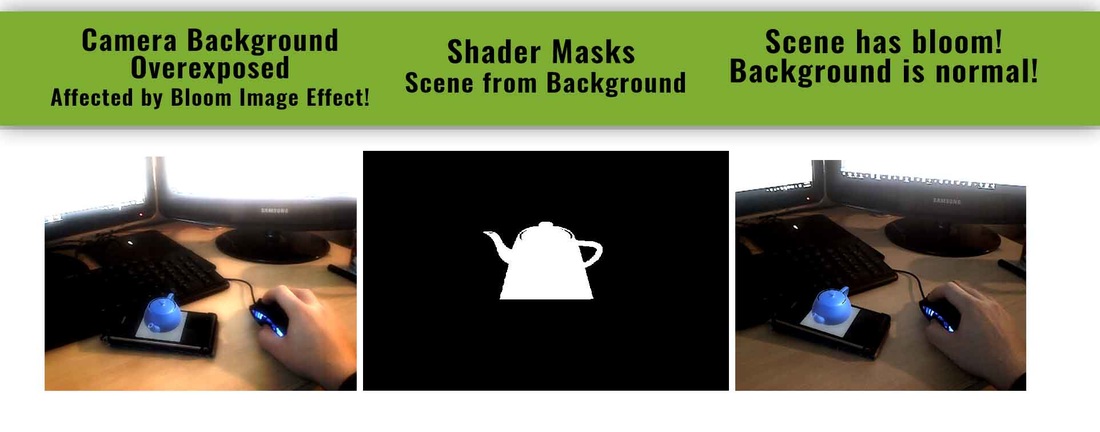
Picture


​The Execution!


Create a new layer, call it "Camera background".
​
Picture

With the default Vuforia camera selected

Set the Clear Flags to "Solid Color"

Background to any colour you want but the Alpha MUST be set to 0.0!

Un-check the Background Camera from the Culling Mask.

Picture
parentCameraMatcher
Create a new camera called "Background Camera" and have it as a child of the Vuforia camera.

Zero off the position, rotation of the newly created camera.

Set Clear Flags to Solid Color and Background to anything you want!

Culling Mask to only render the "Background Camera" layer

Create a C# script called "parentCameraMatcher" or similar and attach it to the Background Camera, this script will set the Field of view to match the Vuforia camera which varies depending on the device being used.

//////////////////////////
using UnityEngine;
using System.Collections;

public class
parentCameraMatcher: MonoBehaviour {
    void Update () {
        GetComponent<Camera>().fieldOfView = transform.parent.gameObject.GetComponent<Camera>().fieldOfView;

 GetComponent<Camera>().farClipPlane = transform.parent.gameObject.GetComponent<Camera>().farClipPlane;
    }    
}
/////////////////////////

Lastly, select the "Background plane" and change its layer to "Background Camera"


Milestone Achieved!

With that done, we should have separated our cameras so that one only renders the scene (The Teapot) and the other only renders our background.
Picture

But how do we combine these!?..

Well, this is where you need to be vigilant as we will be adding a couple lines of code to Unity's Image Effects so they do what we want.
In this instance we'll be editing Unity's Bloom effect however this method can be adapted for many other shader effects.


Attach a "BloomOptomised.cs" script to your Vurforia camera and open it in your most favorite text editor.

We're going to add two variables ------

       public Camera bgCamera;
       private RenderTexture BgRenderTexture;

Then in the "OnRenderImage" function, just after

            if (CheckResources() == false)
            {
                Graphics.Blit (source, destination);
                return;
            }

We're going to add the following code -------

            if (BgRenderTexture == null)
            {
                BgRenderTexture = new RenderTexture(source.width, source.height, 16, RenderTextureFormat.ARGB32);
                bgCamera.GetComponent<Camera>().targetTexture = BgRenderTexture;
                return;
            }
            if (BgRenderTexture.width != source.width)
            {
                BgRenderTexture = new RenderTexture(source.width, source.height, 16, RenderTextureFormat.ARGB32);
                bgCamera.GetComponent<Camera>().targetTexture = BgRenderTexture;
                return;
            }
            fastBloomMaterial.SetTexture("_CamBG", BgRenderTexture);

That's all we need to do inside the "BloomOptomized.cs", ultimately what we've done is added a public variable which we'll plug our background camera into and then checking if the background camera is forwarding what it seeing into a RenderTexture, if not then set up a RenderTexture and set the width and height to the same as the "source" which is the image our primary Vuforia camera generates. The Rendertexture is then pushed into a texture slot called "_CamBG".
Now save "BloomOptomized.cs"


Next step, open "MobileBloom.shader"


Add "sampler2D _CamGB;" just after the "#include "UnityCG.cginc" line.

Lastly, we need to find the fragment function that decides what colours to output to the screen, this can be done by searching "#pragma fragment", the function name that follows is what we're looking for, in this example it's "fragBloom" .
Go to the "fragBloom" function "fixed4 fragBloom ( v2f_simple i ) : SV_Target" function.
Replace it's contents with the following code
            #if UNITY_UV_STARTS_AT_TOP
            fixed4 color = tex2D(_MainTex, i.uv2);
            fixed4 bg = tex2D(_CamBG, i.uv);
            if (color.a == 1) {
                return color + tex2D(_Bloom, i.uv);
            }
            else {
                return bg;
            }        
            #else
            fixed4 color = tex2D(_MainTex, i.uv);
            fixed4 bg = tex2D(_CamBG, i.uv);
            if (color.a == 1) {
                return color + tex2D(_Bloom, i.uv);
            }
            else {
                return bg;
            }                                    
            #endif
Now save "MobileBloom.shader"


The last thing to do is drag the Background Camera into the "BG Camera" public variable in our bloom optimized script and we're ready to go!

I hope this helped, I'm always contactable via email "[email protected]" or post a comment below, I'll see it and get back to you asap.

​
Picture

Reference


Thanks to Alan Zucconi, I used his "Screen shaders and image effects in Unity3D" tutorial to get a good grip of unity's shader setup. I highly recommend checking it out and playing around with the code.
​
​--- Credits to 
​http://www.alanzucconi.com/2015/07/08/screen-shaders-and-postprocessing-effects-in-unity3d/

​

What Have I learn't from making this guide ?

Record a video next time! It would be sooo much quicker than typing and creating screen grabs!
3 Comments

    Archives

    June 2019
    June 2016
    May 2016

    Categories

    All
    3Ds Max
    OpenGL
    Personal
    Substance
    Tutorials
    Unity
    Unreal Engine 4
    Vray

    RSS Feed

Powered by Create your own unique website with customizable templates.
  • About
  • Blog
  • Contact
  • AdvertsTest
  • About
  • Blog
  • Contact
  • AdvertsTest